
Enter at any time you want, and throw the rest away! Semi-discretionary EA “Discretionary MAX”
At any time (discretion), you can let the automatic trading software (EA) take a position!
You can let the automated trading software (EA) take over the process of closing the “discretionary (manual) entry position”.
Even though it is a discretionary entry, you can let the EA take over after the entry.
“Discretionary Max” is useful in these situations:
- When you’re in automated trading and the EA doesn’t take a position, even though you’re about to make a huge profit if the EA enters now
When you look at the chart, there must be times when you think, “If only I had a position now, I could make a profit”.
However, automated trading software (EA) will not be able to make a profit no matter how profitable the price movement is, unless it meets the entry conditions set by the EA.
In such a case, you can ignore the entry conditions of the EA, take a position by yourself, and the EA will take care of the rest.
- As practice and insurance for discretionary trading
When you are able to look at the charts and can somewhat read the market movements, you will want to make discretionary trades.
You have two choices, up or down. If you can read the market, you can make money at least 50% of the time.
However, for a beginner, discretionary trading can be an unsettling experience.
You may wonder, “What if the market moves in the opposite direction? or “When is the right time to make a profit?”
So, you can use this EA as an insurance policy to follow up on your predictions if they are wrong.
How to use “Discretionary MAX”
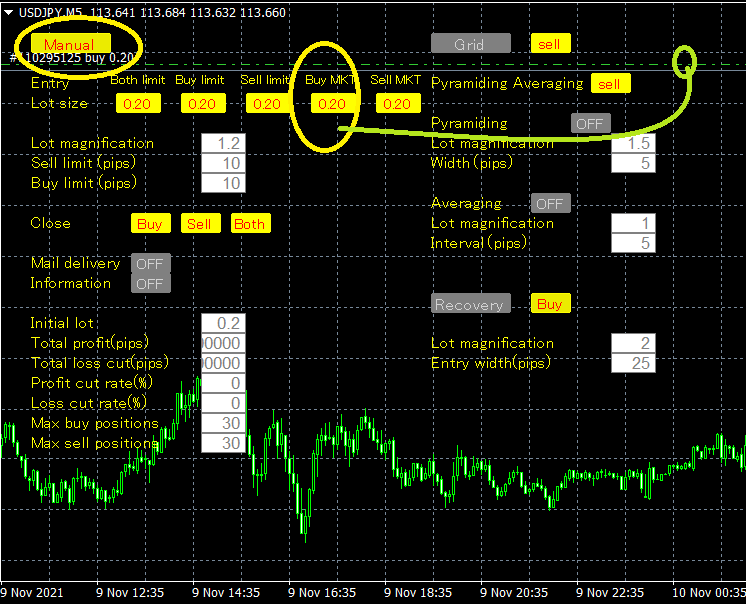
First, let’s enter from the Manual. You can enter by limit price or market price.
After entry, in the direction of your trade:
- Choose Grid if you think the trend is clear and you are confident of the direction.
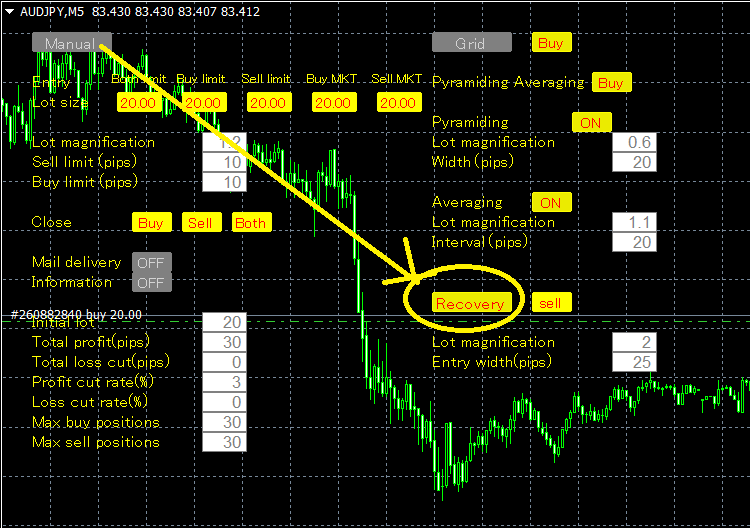
- If you have entered the market but think that there is a possibility of a sudden change in the major trend, choose Recovery.
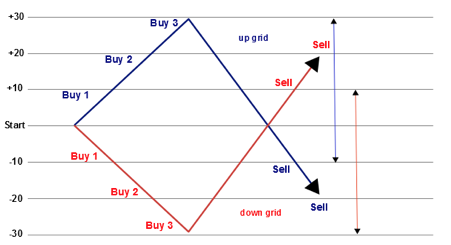
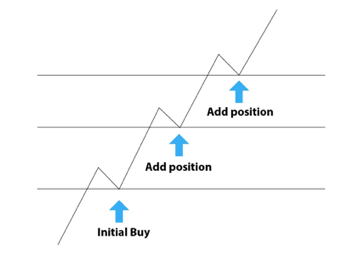
Grid has two functions: Averaging and Pyramiding.
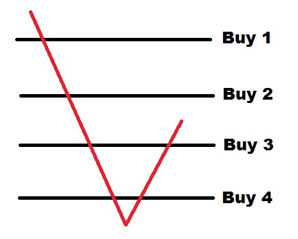
Averaging is a method of buying more trades when the market moves in the opposite direction of your entry. By buying more, you can average your losses when you have unrealized losses, making it easier to make a profit.
Pyramiding allows you to add more trades, i.e., buy more or sell more, when the profits mount up, and of course you can use both at the same time.
With GRID orders, you will be able to efficiently accumulate profits even in small waves.
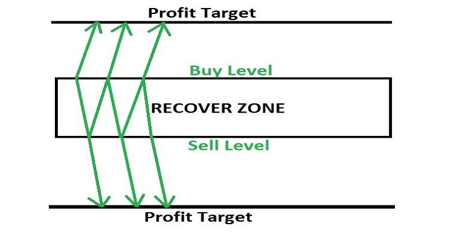
Recovery is a function that automatically places a counter-order and converts it into a profit when the price goes significantly against the entry direction.
For example, it is common for a market to appear to be trending due to a major economic indicator, but the market suddenly reverses due to a “trick” and you end up with a large unrealized loss. In order to avoid this, even in the case of a sudden reversal, the system will automatically increase the trading volume in that direction and turn it into profit.
How to use: Until entry
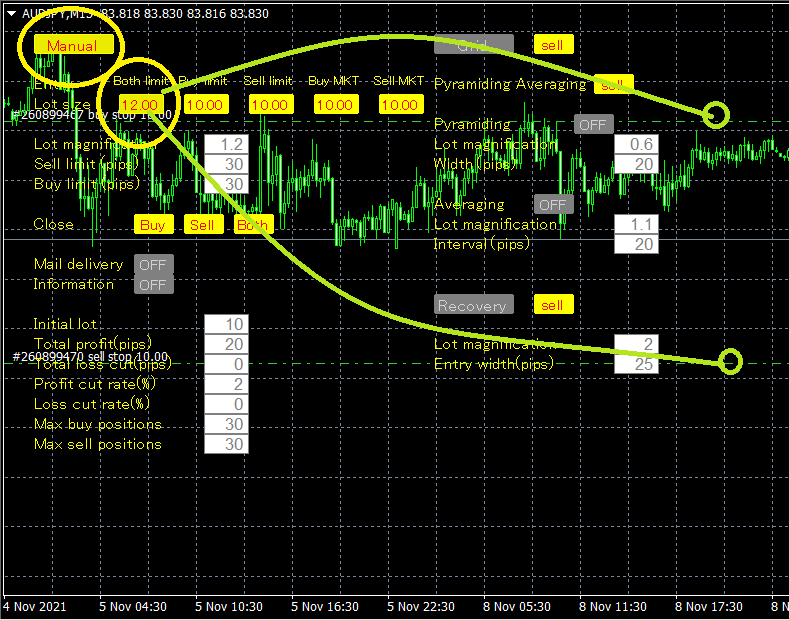
Start from Manual
First, enter with limit price or market price

After that, you can either use manual close, or move to Grid or Recovery.
Manual close

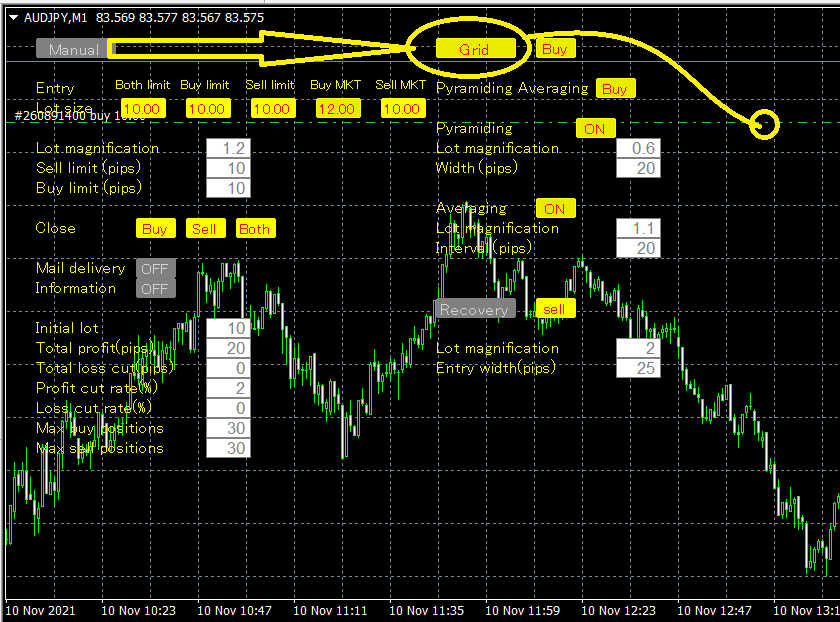
Move to Grid, Click Grid
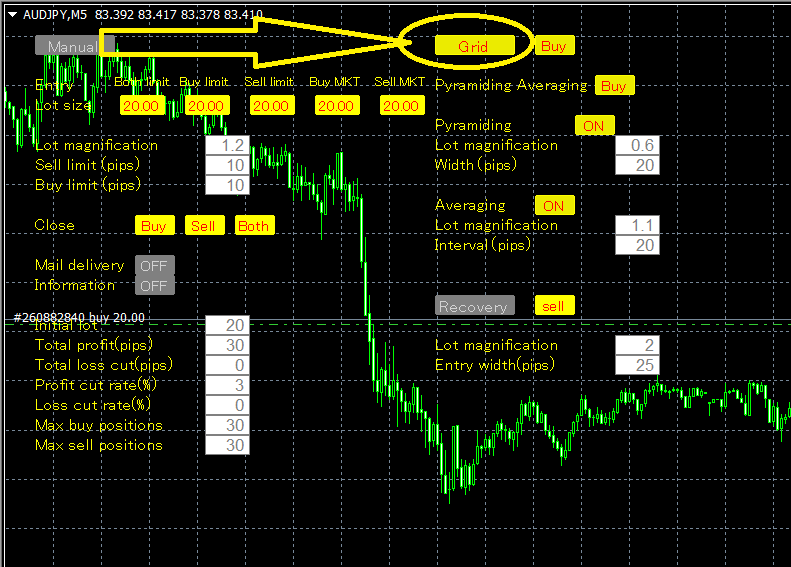
Select the direction of pyramiding and Averaging and turn on what you want to use. (It doesn’t matter which one you use, depending on your strategy)

Manual to Recovery
Start with GRID
Select the direction of entry
Basically, the direction of buying and selling should be the same as the item of Pyramid Averaging below. Also, if you like the pyramid and Averaging underneath, turn them on.
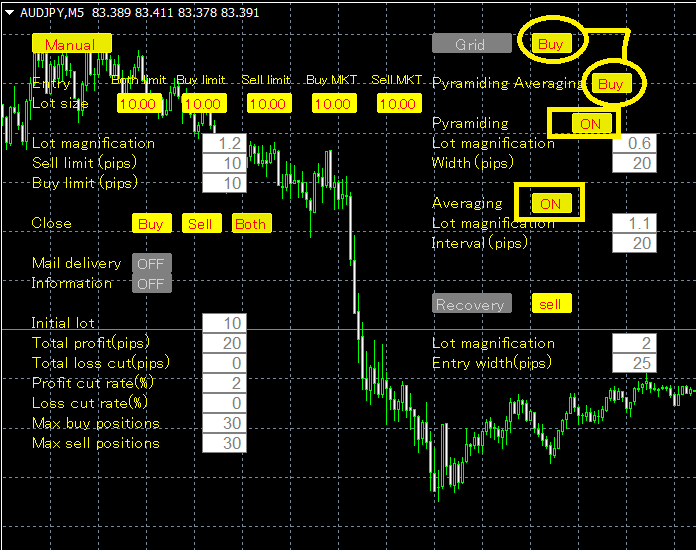
If you click on Grid, you will immediately hold the first position and then proceed to close automatically.
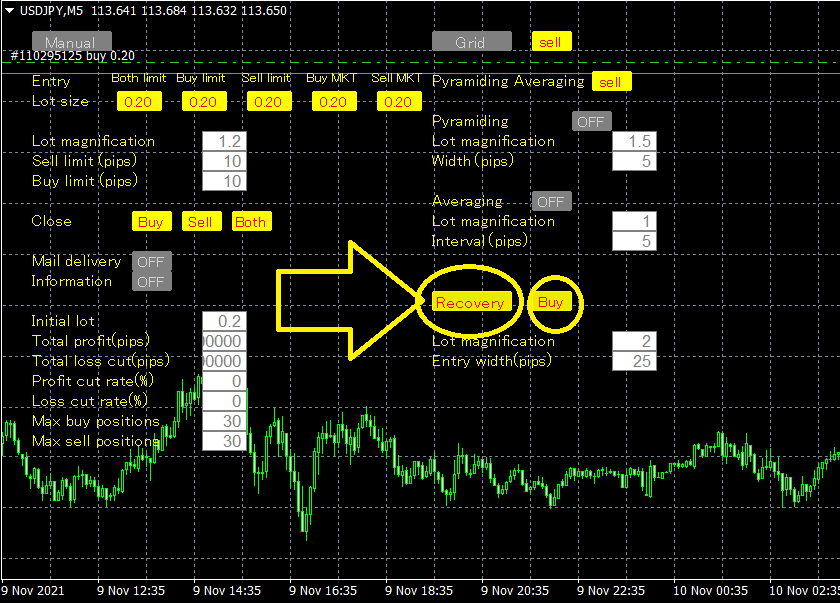
Start with Recovery
Select the first entry direction

After that, when you click Recovery, the first entry will be made and you will be taken to automatic close as it is.

How to use: Details

Buy Order: All buy positions will be closed.
Sell order: All sell positions will be closed.
Sell and Buy: All positions are closed.


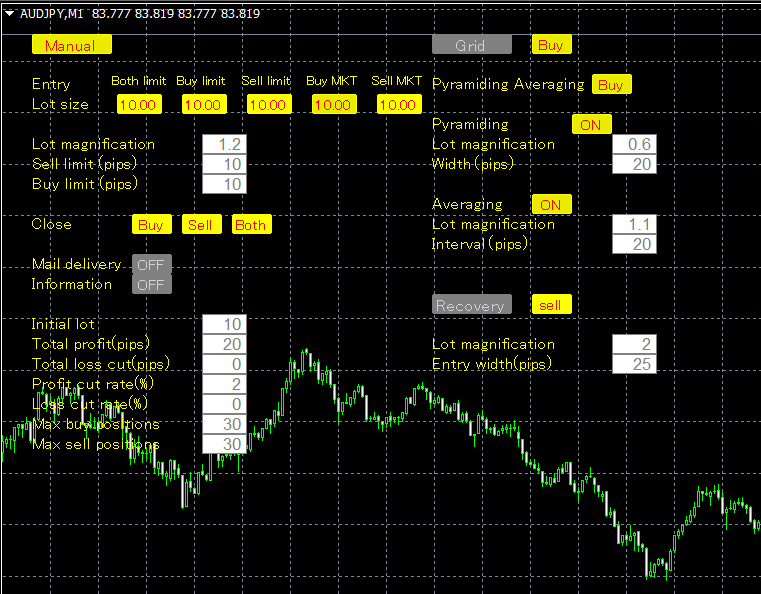
Basic parameters of Manual


Information

Discretionary lot size guidelines
For high risk, high return, aiming to double your money in about a week.
Example: 1000 USD
| Initial lot number | 0.2 |
| Continuity Lot Multiplier | 1.2 |
| Sell Limit(pips) | 15 |
| Buy Limit(pips) | 15 |
| total gain(pips) | 15 |
| Total loss(pips) | 0 |
| probability of profit(%) | 3 |
| Loss rate(%) | 0 |
| Maximum number of positions to buy | 30 |
| Maximum number of positions to sell | 30 |
| Grid | ||
| Pyramiding | ON | |
| Pyramiding Lot Multiplier | 0.7 | |
| Pyramiding interval(PIPS) | 20 | |
| Averaging | ON | |
| Averaging Lot Multiplier | 1.3 | |
| Averaging interval (PIPS) | 20 |
| Recovery | ||
| Counter Lot Multiplier | 2 | |
| Counter entry width (pips) | 25 |
For middle risk, middle return, aiming to double your money in about 2 weeks.
Example: 1000 USD
| Initial lot number | 0.1 |
| Continuity Lot Multiplier | 1.2 |
| Sell Limit(pips) | 15 |
| Buy Limit(pips) | 15 |
| total gain(pips) | 15 |
| Total loss(pips) | 0 |
| probability of profit(%) | 2 |
| Loss rate(%) | 0 |
| Maximum number of positions to buy | 30 |
| Maximum number of positions to sell | 30 |
| Grid | ||
| Pyramiding | ON | |
| Pyramiding Lot Multiplier | 0.7 | |
| Pyramiding interval(PIPS) | 20 | |
| Averaging | ON | |
| Averaging Lot Multiplier | 1.3 | |
| Averaging interval (PIPS) | 20 |
| Recovery | ||
| Counter Lot Multiplier | 2 | |
| Counter entry width (pips) | 25 |
For moderate risk, moderate return, aiming to double your money in about 6 weeks.
Example: 1000 USD
| Initial lot number | 0.05 |
| Continuity Lot Multiplier | 1.2 |
| Sell Limit(pips) | 15 |
| Buy Limit(pips) | 15 |
| total gain(pips) | 15 |
| Total loss(pips) | 0 |
| probability of profit(%) | 1 |
| Loss rate(%) | 0 |
| Maximum number of positions to buy | 30 |
| Maximum number of positions to sell | 30 |
| Grid | ||
| Pyramiding | OFF | |
| Pyramiding Lot Multiplier | 0.7 | |
| Pyramiding interval(PIPS) | 20 | |
| Averaging | ON | |
| Averaging Lot Multiplier | 1.3 | |
| Averaging interval (PIPS) | 20 |
| Recovery | ||
| Counter Lot Multiplier | 2 | |
| Counter entry width (pips) | 25 |
Usage Technique No.1 – Use with Economic Indicators
At the time of the announcement of a major economic indicator (e.g., the time of 3 stars in Yahoo!’s economic indicator), 5 seconds before the indicator is announced, make a limit entry using Manual’s two-way limit price. If there is a move, it will basically go to settlement within a minute. If there is a big move to the contrary, press the Recovery button and let the automatic mode take care of the rest.
The following are recommended:
U.S. economic indicator: Eurodollar (EURUSD), Dollar-Yen (USDJPY)
European economic indicator: Eurodollar (EURUSD) and Euroyen (EURJPY).
British economic indicators: Pound sterling (GBPUSD), Pound sterling (GBPJPY)
Australian economic indicators: Aussie dollar (AUDUSD), Aussie yen (AUDJPY)
New Zealand economic indicators: Kiwi Dollar (NZDUSD) and Kiwi Yen (NZDJPY)
Place a limit price above or below the price, and when one is executed, the other is automatically deleted.
If the entry is a buy, then click on Recovery and change the entry direction to sell.
If the entry is a sell entry, click Recovery to move the entry direction to buy.
Technique No. 2 – When the trend is clear
Make a market entry with Manual against resistance or support. Then leave it to the GRID order.
After entering the market to buy, move to Grid order.

If you enter the market with a buy entry in Manual, you can then enter Grid order mode in the same direction.
Grid ⇒ Buy ⇒ Turn Averaging “ON” ⇒ Turn Pyramiding “ON”
In the case of a manual sell entry, Grid ⇒ Buy ⇒ Turn Averaging “ON” ⇒ Turn Pyramiding “ON”
Money Management
Basically, it is a good idea to start with a small amount, keeping your account separate from other EAs.
Start with a small amount by trying a few times with a demo account for practice.